
Unwanted circuit modifications, opening rounds of the season, unforgettable duels, the change from a day race to a night spectacle and even a cancelation due to political uprising. The Bahrain International Circuit in Sakhir has seen it all since its historic introduction in 2004, and is the venue for the second round of the 2017 Formula One season.
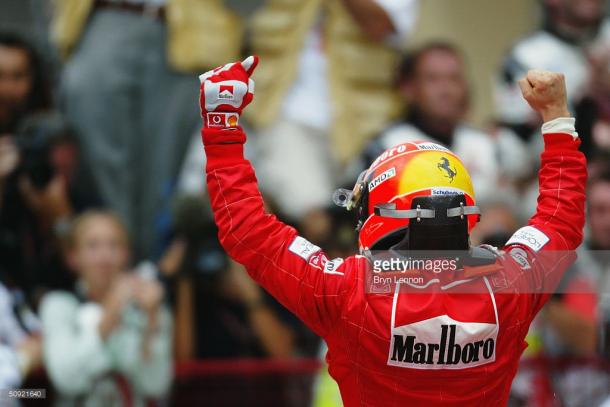
Designed by the much maligned Hermann Tilke - costing just over £80 million to complete, the track's debut race hosted the first ever Grand Prix in the Middle East, and was won (rather inevitably) by Michael Schumacher - his only win in Bahrain, and his lap record still stands today. Turn 1 was even named in the German's honour after his tragic skiing accident in late 2013, and is the prime overtaking spot.
Located in the middle of a desert, the trackside sand is secured by an adhesive to stop it blowing onto the circuit, causing all sorts of dangers and worries.
Flowing with a number of tricky corners and braking points, the permanent track poses more of a challenge in comparison to Australia and its fairly wide diameter allows for close racing. One gripe that many have with the facility is that the run-off areas are too forgiving, and don't punish the drivers enough for making mistakes.
And whilst the venue's primary target of enticing more Bahraini nationals to make a name for themselves in top level motorsport has garnered no real success as of yet, the race has indirectly benefited tourism income in the country.
Track guide
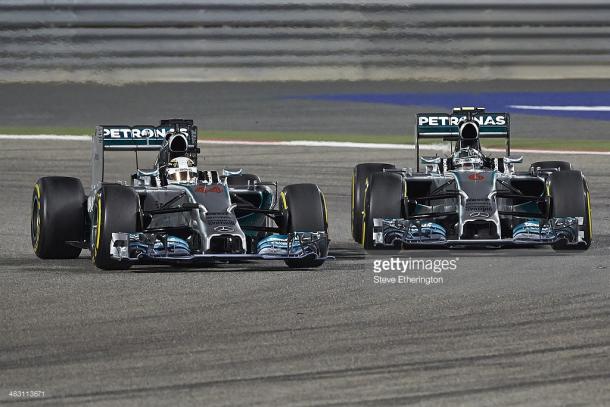
The pit straight is one of two DRS zones on the course and leads to a challenging braking point for the Schumacher hairpin - at around 110 metres before the apex. The tight right flows into an immediate open left taken flat out, but drivers have to be wary of the line they opt to take - get it wrong and the kinked Turn 3 and the run up to Turn 4 will be compromised. Turn 4 is tight on entry, wide on exit, with drivers using all of the track - and even a bit more in Nico Rosberg's case whilst fighting with Lewis Hamilton in 2014 - in order to take the path of least resistance and turning angle.
This marks the end of the first sector and the start of an 'S' section. Turn 5 takes you to the left and after a couple of downshifts, Six brings you back to the right, before a long left, taken whilst feathering the throttle sets the drivers up for another hairpin; careful not to snatch a front brake as you decrease speed whilst still coaxing the car over to the left hand side of the track.
After that has been negotiated, the most challenging braking zone and corner on the circuit greets you next. Fairly blind, drivers are braking whilst turning and moving down through the gearbox - this all unsettles the car - and to add to that, they can only see the apex of Turn 10 in their peripherals until the last moment. A bit of guesswork is needed, get it wrong and an embarrassing excursion onto the sand awaits.
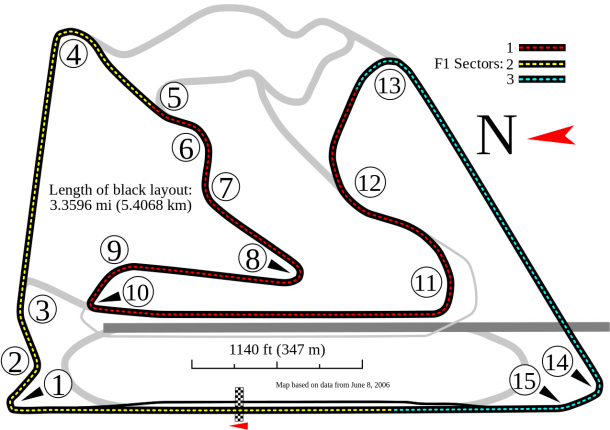
That leads onto the second DRS straight, a welcome relief after a sequence of fast approaching corners. There's not much time to relax through, as the straight is fairly short, ending with a short braking zone into Turn 11, a corner that tightens on the exit and leads immediately into the uphill long, sweeping right of 12. Try to straighten the car up as quickly as possible as the next braking zone and timing sector immediately hits you. Turn 13 is clunky in comparison and the exit is of paramount importance due to another medium length straight proceeding it. Lastly, whilst heading downhill, brake as close to the 100 metre board as you dare for the double apexed right of the final two corners, Turns 14 and 15. Don't run too wide onto the exit kerb as you return to the long pit straight for another lap.
Statistics
Most wins for a driver: Fernando Alonso - 3
Most wins for a constructor: Ferrari - 4
Lap Record: 1:30.252 - Michael Schumacher, Ferrari, 2004
Did you know?
The longer "endurance" layout was used to open the 2010 Formula One season, but due to a dull race and a time increase of around 25 seconds per lap, the layout was scrapped and the series returned to the original format from 2012 onwards.